
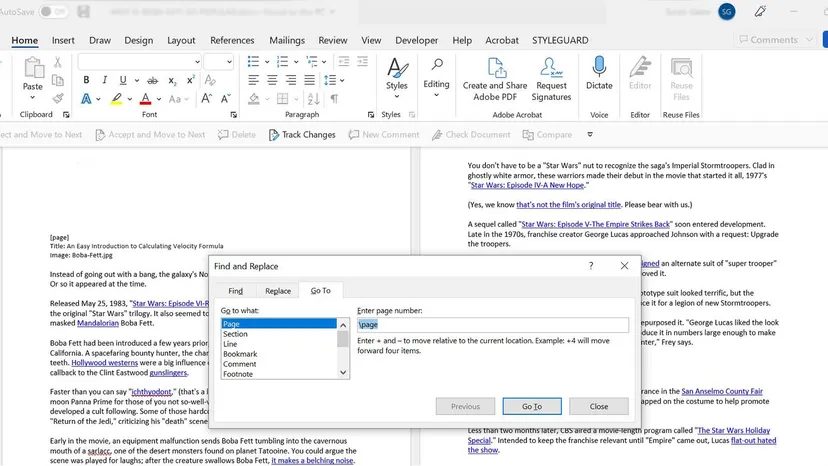
Deleting a page in Microsoft Word sounds simple. It isn’t always. You type a sentence. Press enter. Suddenly, you have a phantom page at the end of your document that refuses to vanish. Or maybe you want to surgically remove a middle section without breaking the rest of your manuscript.
Budding writers often struggle with this. They just want to delete the first few pages of their draft. Professional editors need to trim chapters without messing up headers. The software gives you tools. But you have to know which one to use.
Here is the reality of deleting pages in Word. It depends on what is actually on the page. And it depends on whether you are on a PC or a Mac.
How to Delete a Blank Page in Word
Blank pages are the most annoying part of document formatting. They usually happen because Word added a paragraph mark when it shouldn’t have. Or a page break got stuck.
You need to see the invisible structure first.
For Windows users:
1. Click anywhere in your document.
2. Press Ctrl + Shift + 8. This toggles the visibility of paragraph marks (¶).
3. Scroll to the blank page.
4. Look for extra ¶ symbols or a “Page Break” line.
5. Highlight them. Press Delete until the page goes away.
For Mac users:
1. Click in the document.
2. Press Command + 8.
3. Find the blank page.
4. Select the ¶ marks or page breaks.
5. Press Delete.
It is that straightforward. If the page disappears, you are done. If not, the problem is deeper.
How to Fix the Stubborn End-of-Document Page
Sometimes the blank page at the very end of your file will not die. This is because Word forces an end-of-document paragraph mark. It keeps the structure intact. Think of it as the software’s way of keeping everything in line.
But that mark sometimes pushes itself onto a new page. You need to shrink it.
- Press
Ctrl+Shift+8(orCmd+8on Mac) to show the marks. - Select the final paragraph mark on the blank page.
- Change the font size to 1.
- Press
Enter(orReturn).
The mark shrinks. It fits on the previous page. The blank page vanishes. Hide the marks again.
This trick works for most end-of-doc issues. It is a quick fix for a frustrating problem.
How to Delete a Specific Page in Word Without Affecting Other Content
What if the page in the middle is the one you want gone? You cannot just highlight and delete if you are worried about breaking formatting. You need precision.
Use the Navigation Pane. It gives you a visual map of your document.
Steps for Both Mac and Windows
- Open the Navigation Pane. Go to the View tab. Check the box for Navigation Pane. A sidebar appears on the left.
- Click on Pages. You will see thumbnails of every page.
- Find the page you want to delete. Click its thumbnail. Word jumps to that location.
- Highlight the content. Click at the beginning of the page. Hold
Shiftand click at the end. This selects everything on that page. - Press
DeleteorBackspace.
If the page is still there, you left behind formatting ghosts.
- Turn on formatting marks (the ¶ button).
- Look for stray paragraph marks or page breaks. Delete them.
- Check for Section Breaks. These are tricky. Go to the Layout tab. Click Breaks. If you see a section break causing the gap, place your cursor before it. Press
Delete.
Be careful here. Deleting a section break can merge the formatting of two different sections. Headers, footers, and margins might change. You need to adjust the layout afterward.
Troubleshooting and Managing Page Breaks
Page breaks cause the most headaches. They force content to jump to a new page. Sometimes you want that. Sometimes you want to delete it.
If you have unwanted blank pages, the culprit is likely a manual page break.
- Show your formatting marks.
- Look for a dotted line labeled Page Break or Section Break.
- Click before the line. Press
Delete.
If you need to move the break instead of deleting it, cut and paste it. Place your cursor before it. Cut it (Ctrl + X or Cmd + X ). Paste it (Ctrl + V or Cmd + V ) where you want it.
Sometimes manual breaks are the problem. Word can insert them automatically if your content is too long for one page. To fix this, go to Layout > Breaks. Choose Next Page if you need a new section. Or choose Continuous if you want a column break without a new page.
Older documents can be messy. Compatibility issues sometimes cause weird break behavior. If you are working with a file created in an older version of Word, check for formatting inconsistencies.
Microsoft Word is powerful. But it is also literal. It does exactly what you tell it to. If you tell it to break the page, it will. If you leave extra marks, it will honor them. Understanding the mechanics saves you time. It stops you from fighting the software.
You just need to see what is under the hood. The ¶ button is your best friend. Use it. Delete the junk. Keep the story clean.